| |
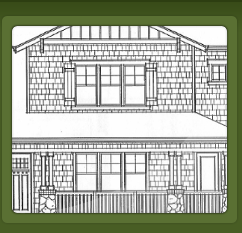
Affordable Housing Construction
We always try to thoughtfully find creative ways to save clients’ money. Our newest resource is in quality construction; saving our client’s up to 70% on construction time and 30% on their construction costs. –That’s the power of the network! |
 |
|
This lovely Fountaingrove lot in Santa Rosa, sitting atop a rolling Sonoma County hillside, will soon have a beautiful new custom built home nestled on it. It will be completed in 90 days; and if that’s not amazing enough…it will be built with a 30% cost savings. |
Please follow the progress below. Next step, excavation. |
|
|
 |
|
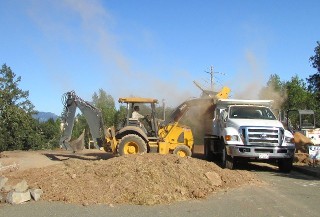
The excavation has begun and the cores have been ordered! (What's a "Core?")
The Core is a precision built construction component. –It’s not the whole house; just the most complex and expensive part. But, when this part of the home is built off site (within a controlled environment using the best construction practices for quality, energy efficiency and safety) it also becomes more affordable.
|
Next step, finish excavation. |
|
|
 |
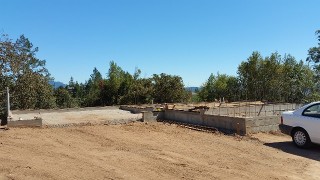
Day three of excavation complete |
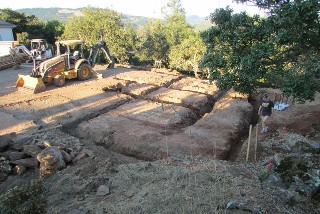
The excavation is complete, and we're ready for the foundation forms to be set. Once the foundation is finished, the cores will be delivered. (What are the benefits of the core?)
- Providing an average 30% savings (The larger the percentage of core, the larger the savings)
- Build a home in 90 days (A 70% reduction in typical construction time- saving more money)
- Eco friendly / Highly Green (The amount of waste after building a core fits in a 5 gallon bucket)
- Quality Engineered (Exceeding local building code requirements; meeting strict IBC regulations)
- Quality Constructed (Undergoing constant quality control inspections during construction)
|
Next step, put up the forms and rebar. |
|
|
 |
|
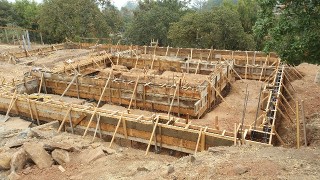
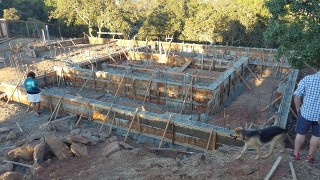
It's the end of week one. The forms have been completed and the rebar is in place. |
|
|
|
|
 |
|
|
|
Next step, pour the concrete to complete the foundation. |
|
|
 |
|
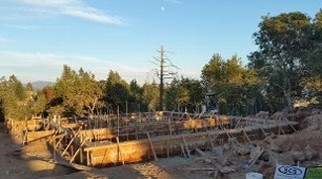
It may be hard to see from the photo, but there's now concrete within those forms. |
|
|
|
|
 |
|
|
|
Next step, remove the forms and prepare for the cores to be placed. . |
|
|
 |
|
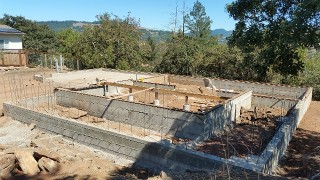
It's the end of week two and the forms have been taken down. Now the foundation just needs to set up long enough before the cores are placed on top. |
|
|
|
|
 |
|
|
|
Next step, core inspections before delivery. . |
|
|
 |
|
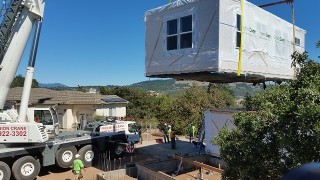
As the foundation finishes setting up (drying/curing) we’re inspecting the cores at the factory. It’s taken about 30 days to reach this point in production. Now, we want to confirm everything is correct before they finish the final touches and we authorize delivery. |
Though it still needs counters and appliances, this kitchen core should be ready to deliver next week. |
|
|
 |
|
They don't look like much now, but a beautifully designed house will be built around these two cores. And the fact that these cores will lower the total construction cost by 30%...Well, that's a thing of beauty too. |
Next step, delivery and installation of the cores. |
|
|
 |
|
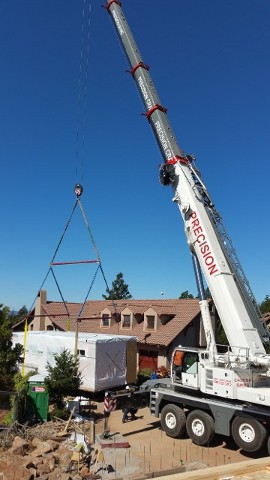
It's been four weeks since breaking ground and six weeks since the core orders were placed. Today's the big day: The cores are delivered and placed on the foundation by crane. |
|
|
|
|
 |
|
Cores on their own don't look like much. The neighbors might understandably fear a "Lego" house is being built. Rest assured (and keep following our progress) that when this house is completed within sixty days- it will be a beautiful custom home. |
|
|
|
|
 |
|
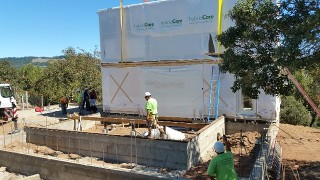
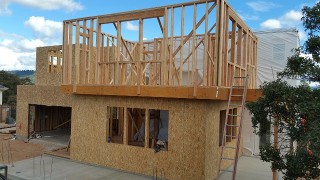
I may need to find a new place to take my weekly photo- these cores represent about half the house and I'm already not able to fit everything in the picture from here. |
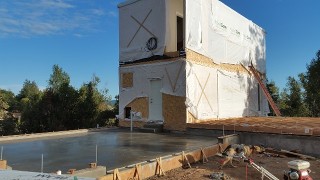
Next step, frame in the subfloor for the remaining first floor and pour the garage slab before framing the remaining first floor walls. |
|
|
 |
|
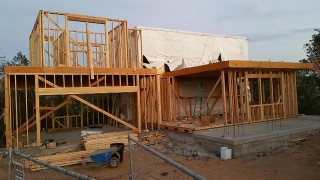
The team was anxious to get to work now that the cores are on site. So, they framed out the subfloor over the weekend. |
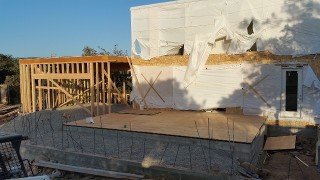
Next step, pour the concrete for the garage slab before framing the non-core walls for the 1st floor. |
|
|
 |
|
The garage slab was poured earlier in the week. . |
|
|
|
|
 |
|
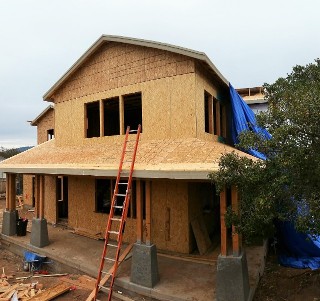
By the end of the week, the garage has been framed in and the subfloor sheeted. . |
Next step: Finish adding rock for the porch, compact the rock, prep for steel and concrete. |
|
|
 |
|
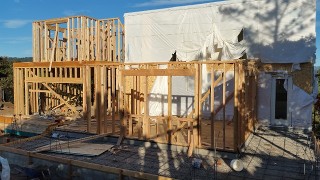
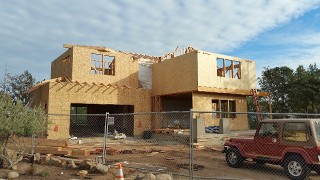
The upstairs (non-core) framing began and the downstairs (non-core) framing was almost completed. |
|
|
|
|
 |
|
Also, the remaining rock and rebar was added for the future front porch. |
Next step: Finish framing the non-core section of the house and pour the concrete for the front porch. |
|
|
 |
|
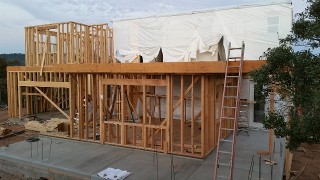
We’re halfway through our project. The upstairs floor joists have been installed and covered. Also, the concrete front/entry patio has been poured. |
|
|
|
|
 |
|
|
|
Next step: Finish framing the 2nd floor and sheet the exterior. . |
|
|
 |
|
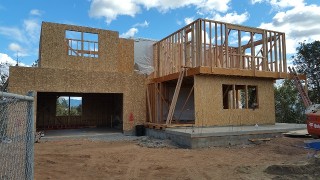
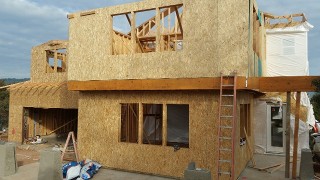
The framing is almost done; and most of the wall sheeting is up. . |
|
|
|
|
 |
|
|
|
Next step: Pour concrete forms on front porch for the posts which will support the roof on this part of the house; and finished sheeting the exterior. |
|
|
 |
|
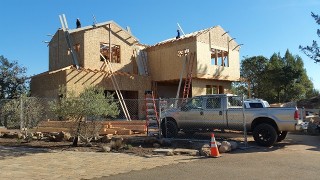
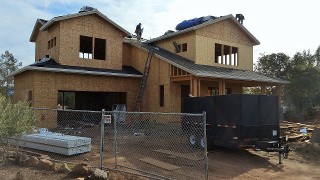
The concrete was poured for the front porch posts earlier in the week; and by the end of the week the roof trusses were delivered. |
|
|
|
|
 |
|
|
|
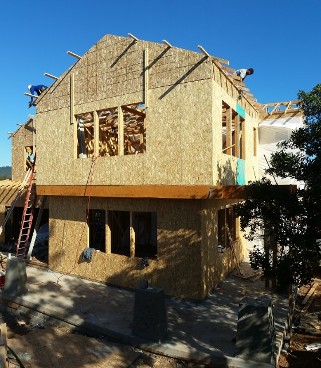
Next step: Finish installing trusses and sheet the roof so roofing material can be installed. . |
|
|
 |
|
Most of the trusses are up and ready to be sheeted. . |
|
|
|
|
 |
|
|
|
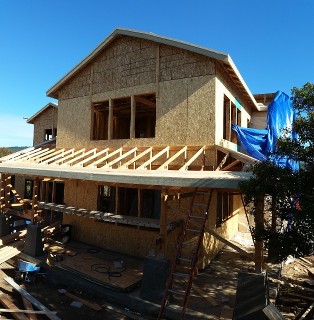
Next step: Frame around front porch so last of the remaining roof trusses can be installed and roof can be sheeted. |
|
|
 |
|
Most of the roof has been sheeted; and the front porch has been framed with truss tails put in place above. |
|
|
|
|
 |
|
|
|
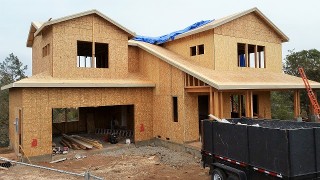
Next step: Finish remaining framing around front porch in order to sheet the last of the roof. |
|
|
 |
|
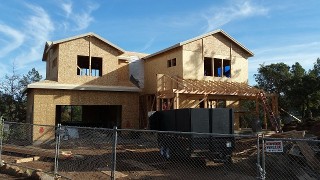
All exterior sheeting and framing is completed. . |
|
|
|
|
 |
|
|
|
Next step: Install roofing doors and windows. . |
|
|
 |
|
We have a roof. Now we need to put up the house wrap and install the doors and windows. |
|
|
|
|
 |
|
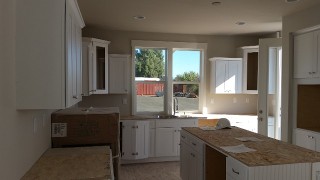
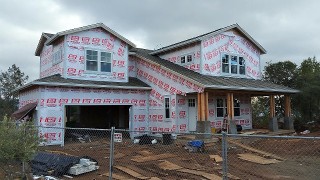
The house is wrapped. The doors and windows are in; as are the trim and gutters. Now that the house is greatly protected; inside work in the non-cores can begin. |
|
|
|
|
 |
|
To fit the whole house in the picture, I'm stitching two photos together to get the one image. Please forgive the inconsistent lines of the merged photos. |
Next step: Install corbels and decorative trim so the siding can go on. . |
|
|
 |
|
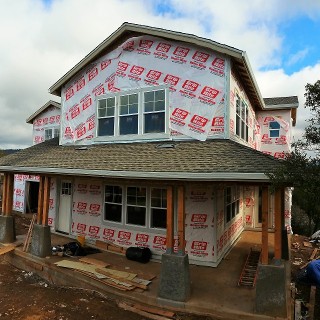
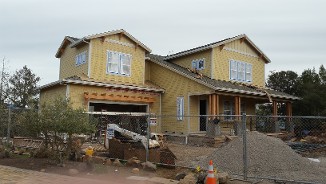
The siding is up and the paiting has started. Prep work for the driveway has also begun. |
Next step: Preperation work for the driveway (forms and rebar should be in next week) and finish painting. |
|
|
 |
|
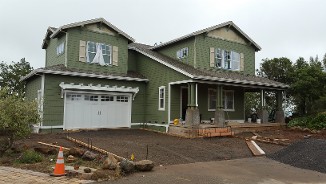
The garage door is in; painting is almost completed and the driveway/entry steps have been formed with rebar in place. |
Next step: Pour concrete for driveway and entry steps, stone work and railing for entry and finish all painting. |
|
|
 |
|
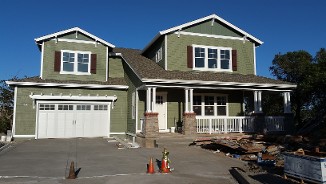
Driveway and entry steps finished, along with entry stone work for colums and rails. |
Next step: Bring in needed gravel, topsoil and mulch for hardscaping. (All plants have been ordered and are already available to be picked up from the nursery.) |
|
|
 |
|
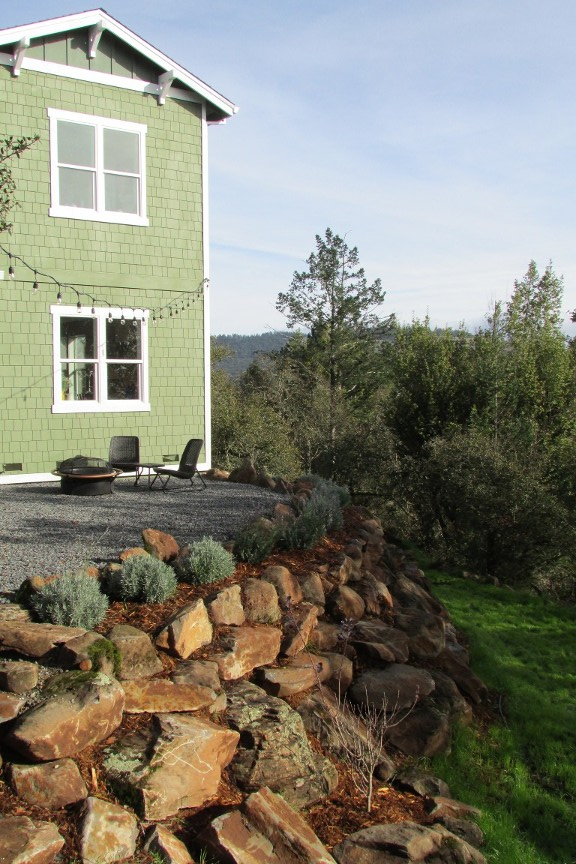
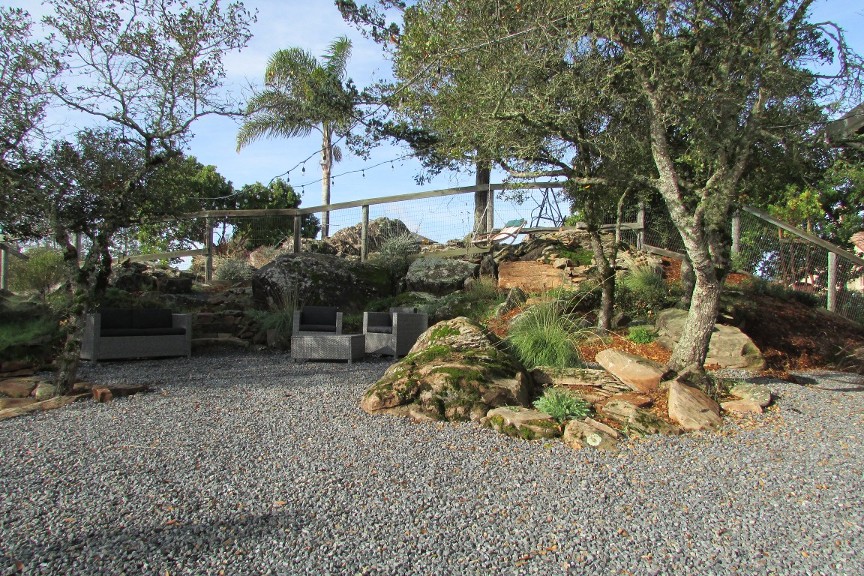
The hardscaping is complete and the plants have been laid out. |
Next step: Get the plants in the ground along with remaining topsoil, install the irrigation system and cover with mulch. |
|
|
 |
|
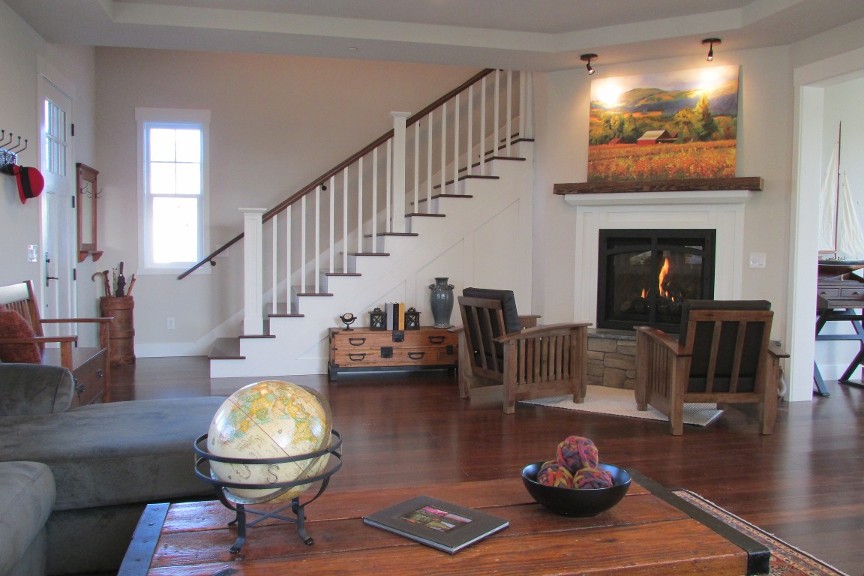
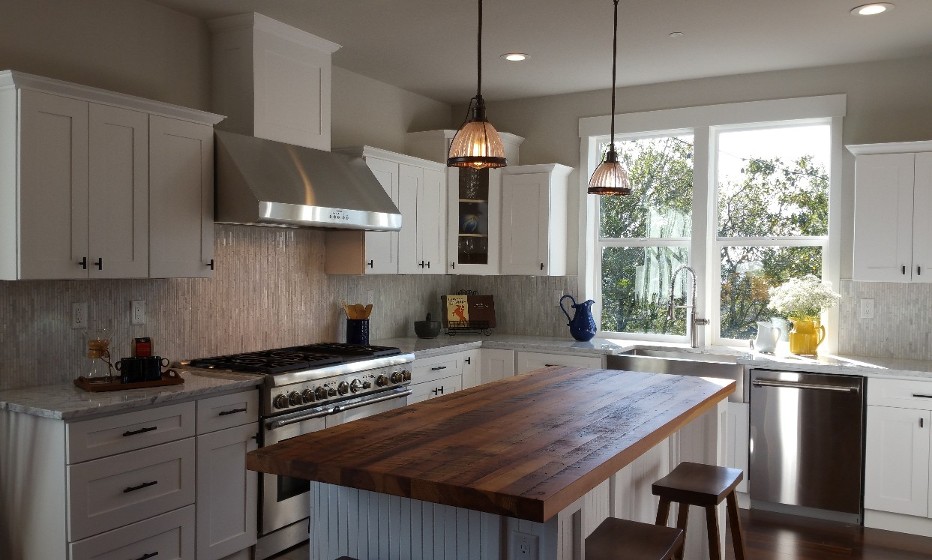
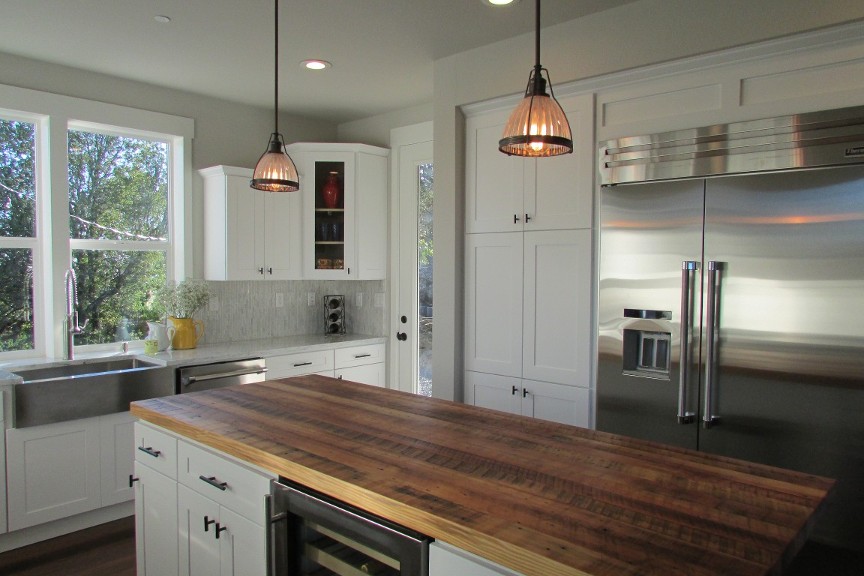
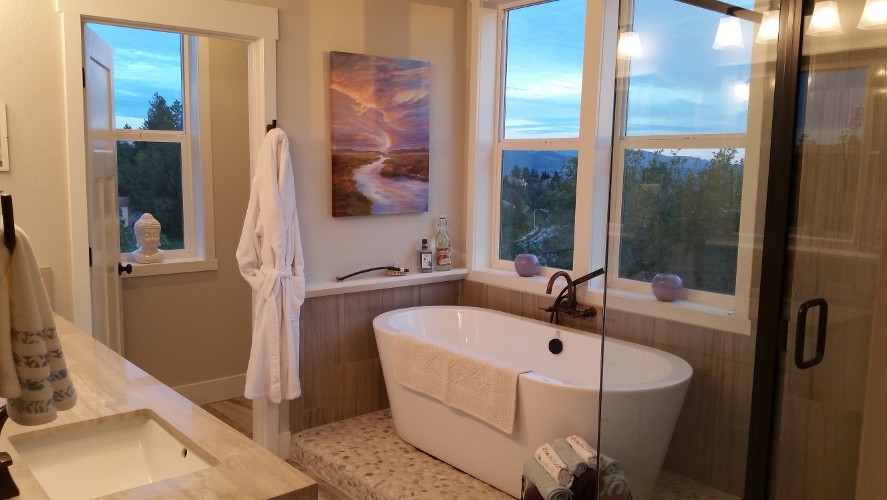
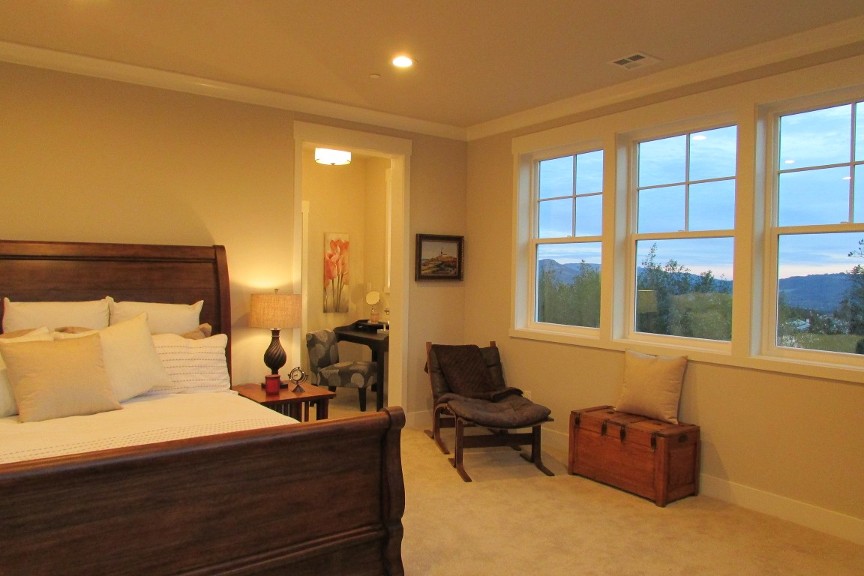
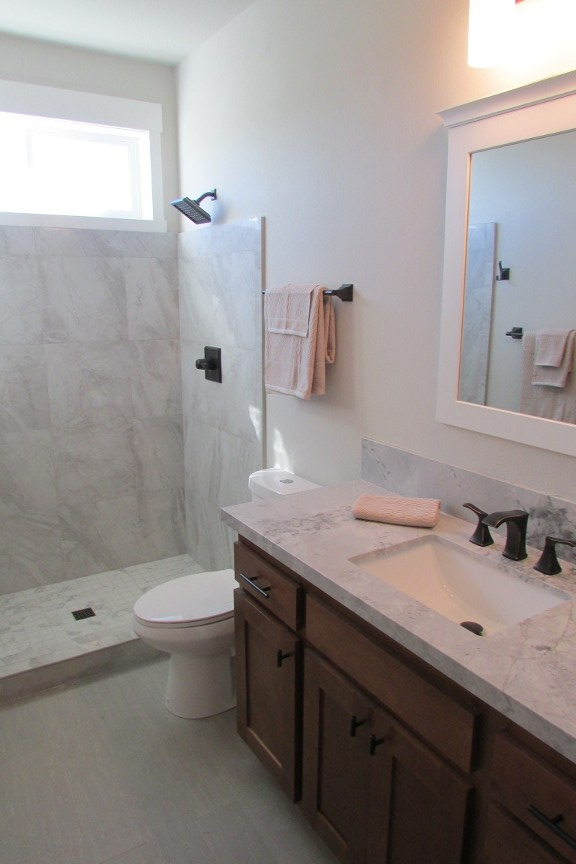
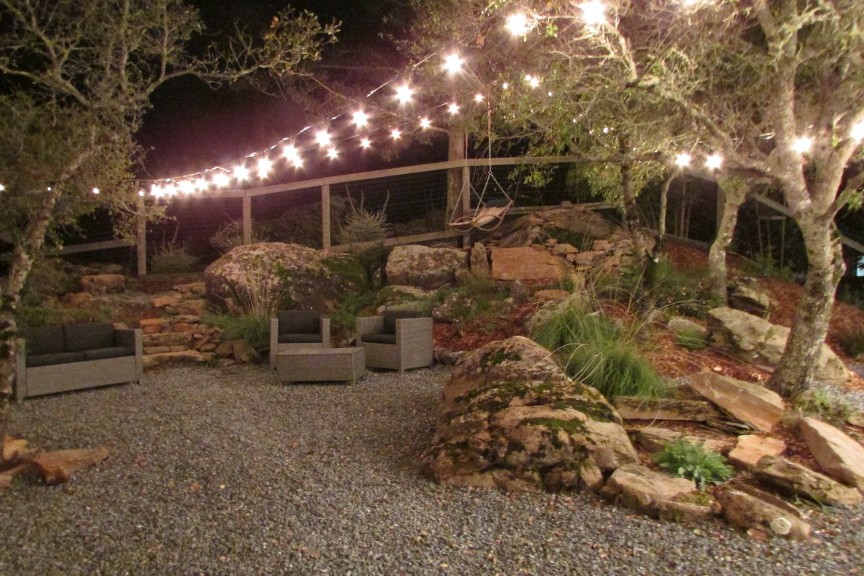
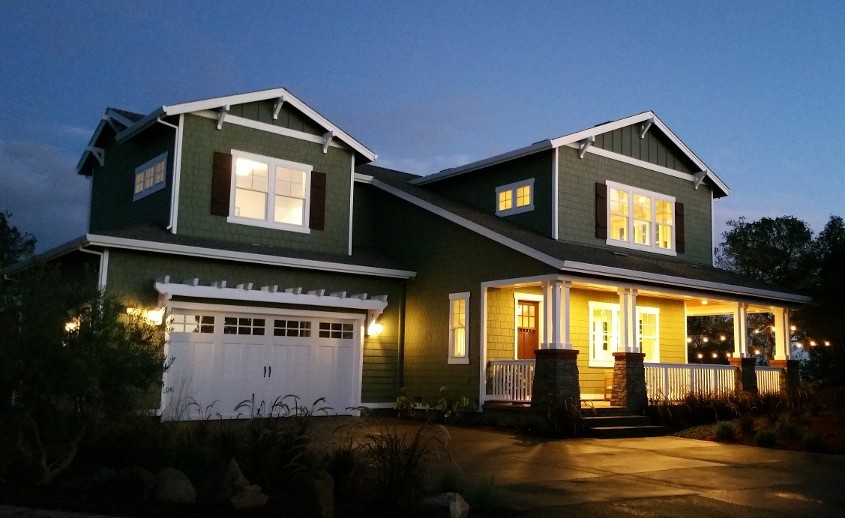
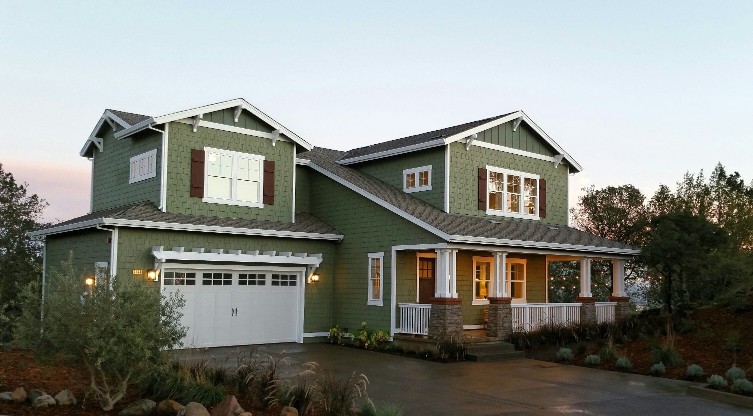
We have a finished house. |
|
|
|
|
|
|
|